Building Your First 3D Model
Once the data is prepared, you can start creating your first 3D model. Thanks to our algorithms, the process is very simple and divided into two consecutive steps: Creating Preview and Creating Model. The Create Preview algorithm registers photos by determining their position in space, resulting in a Photo Scan with aligned photos. The Create Model algorithm generates the final 3D model, which can then be post-processed and exported or imported.
Creating Preview
To create preview:
Select the imported photos in the Workspace panel
Open Tools → AI Photogrammetry
Click the gear icon of the Create Preview algorithm to open its settings window.
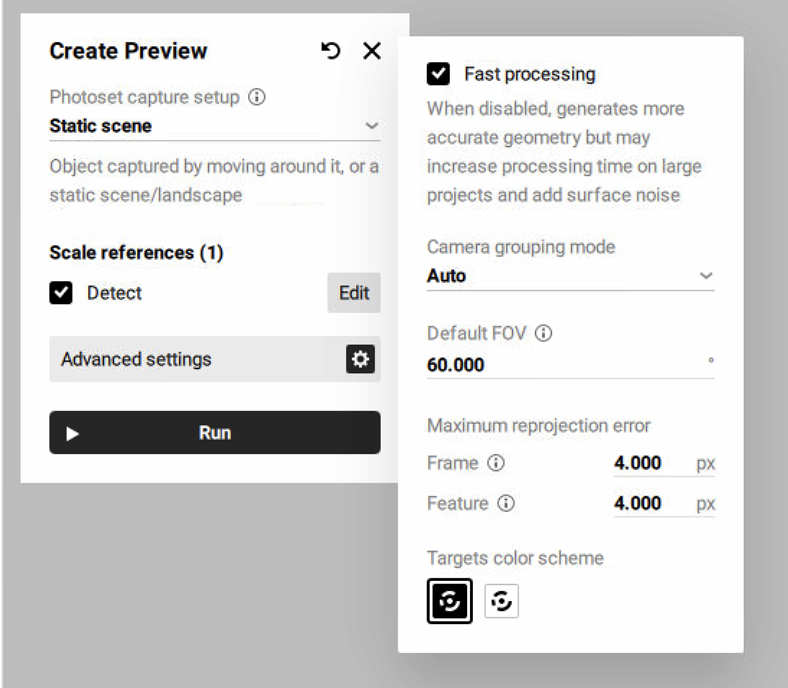
Figure 15 Create Preview settings
Before creating a preview of your future model, you can adjust the following settings:
Photoset capture setup defines how the object or scene appears across the dataset. To ensure correct photo alignment and reconstruction, select Rotated/Moved in each photo if the object was rotated (e.g., on a turntable), flipped, or moved to different positions during capture, and you are uploading all photos in a single photoset. Otherwise, select Unique for each photoset if you are uploading such data in multiple photosets.
If you select the Rotated/Moved in each photo or Unique for each photoset option, Artec Studio Lite will prompt you to set up masks. For more information on photogrammetry and the types of algorithms that Artec Studio Lite suggests, refer to Photogrammetry Overview.
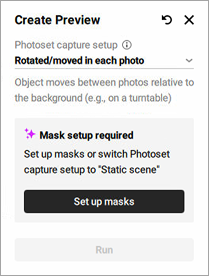
Figure 16 Setup masks required
Detect for the Scale references section determines whether scale references will be analyzed or not. Refer to Using Scale References on how to create and use scale references.
Fast processing speeds up processing but may reduce geometric accuracy
Camera grouping mode defines how the software interprets which photos were taken by the same camera. This helps the algorithm handle variations in camera parameters, especially when metadata is missing or unreliable.
Auto assumes that all photos were taken with the same camera. Suitable when there is no metadata and the images are likely from a single device without focal length changes.
Shared per photoset treats each photoset as taken with a different camera or with significantly different camera settings. Recommended when switching phones, lenses, or focal lengths between photosets.
Individual considers every photo as taken with a different camera. Best used when camera parameters, such as focal length, may vary between individual photos.
Default FOV specifies the camera’s field of view, used when this information is missing or unreadable from photo metadata. The default value is 60°.
Frame specifies the maximum allowable deviation for matching points between individual frames or photos. It limits how much point positions can vary within a photoset; if the reprojection error exceeds this value, the program may mark such frames as mismatches. The default value is 4.000 px.
Feature sets the maximum error for matching object features, such as contours or textures; lower values lead to more precise reconstruction of object details. The default value is 4.000 px.
Target color scheme defines the color scheme of the targets for detection, with options for white on black or black on white.
Click Run to launch the algorithm
Once calculation is finished, a Photo Scan object appears in the Workspace panel. This photo scan is colored so you can see the general shape of your object.
Double-click on the newly created Photo Scan object in the Workspace panel and modify the cropping box around the object to adjust the region of reconstruction.
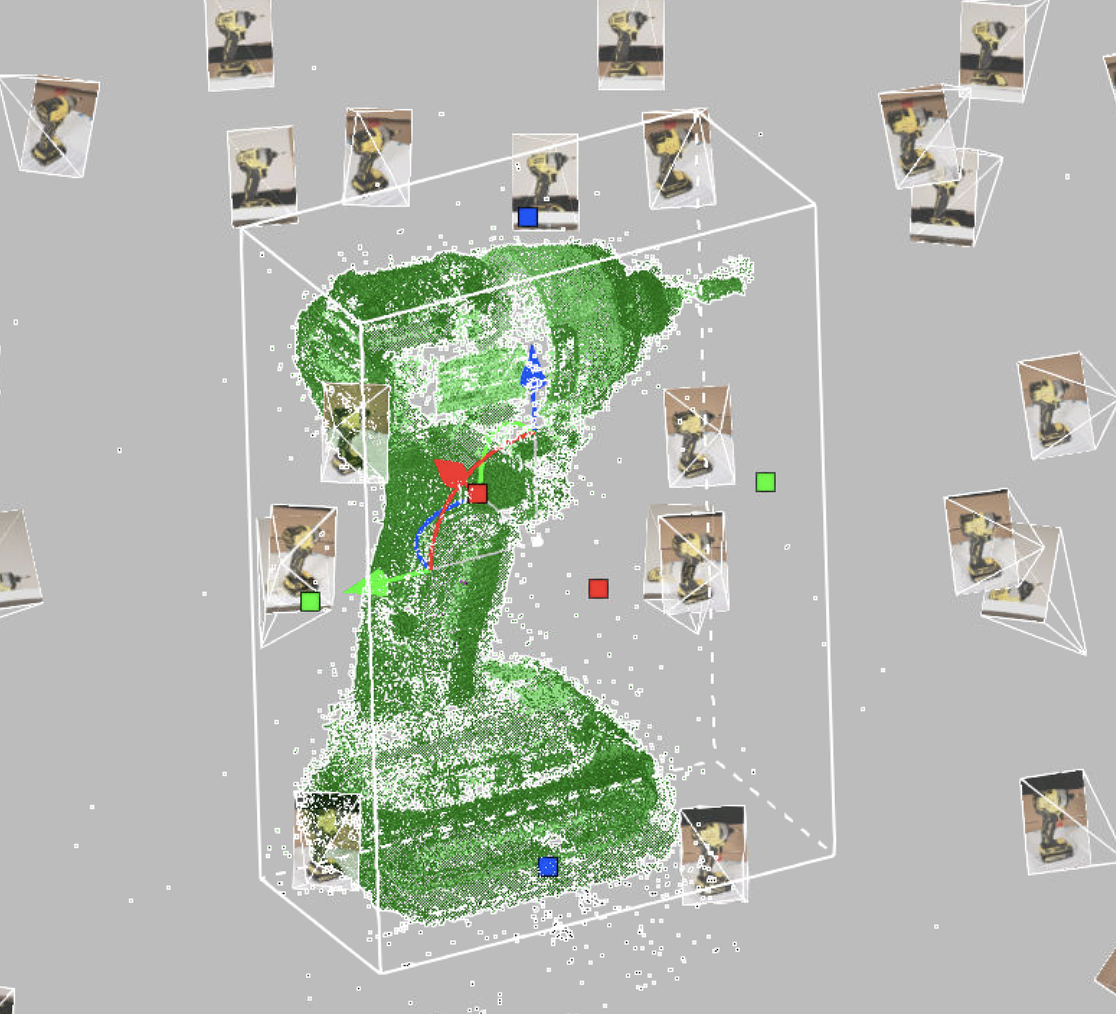
Figure 17 Created Photo Scan in the cropping box
Double-click an individual picture to inspect it closer. It will be opened in the viewing mode:
To compare the Photo Scan object’s texture with a reference photo or check for misalignments, use the Show photo toggle or press Ctrl+Q. The reference photo will be hidden.
To zoom in and out, use Scroll wheel.
To move the picture, hover over it and drag it holding down Scroll wheel.
To exit the viewing mode, press either LMB or RMB and drag in any direction.
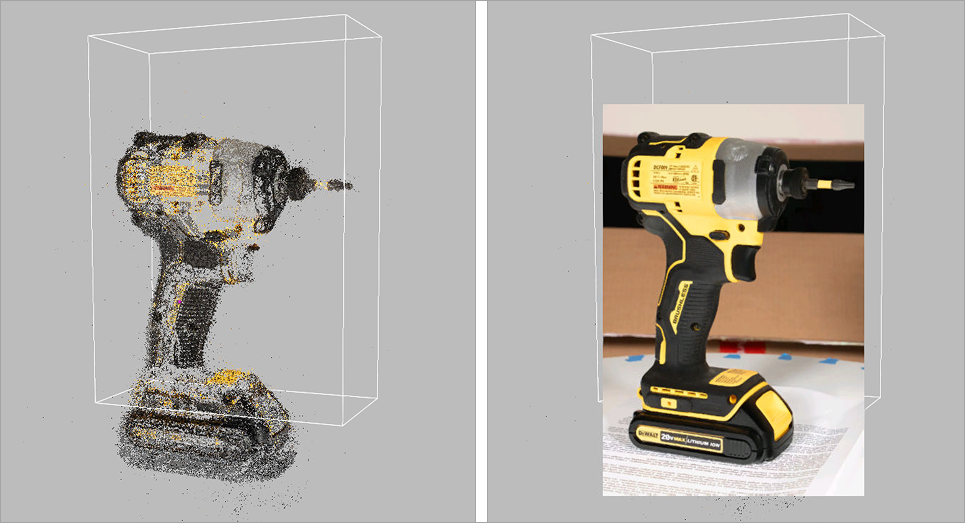
Figure 18 Photo Scan: viewing mode
Creating Model
To create model:
Select the previously created Photo Scan in the Workspace panel
If the panel is closed, open Tools → AI Photogrammetry
Click the gear icon of the Create Model algorithm to open its settings window.
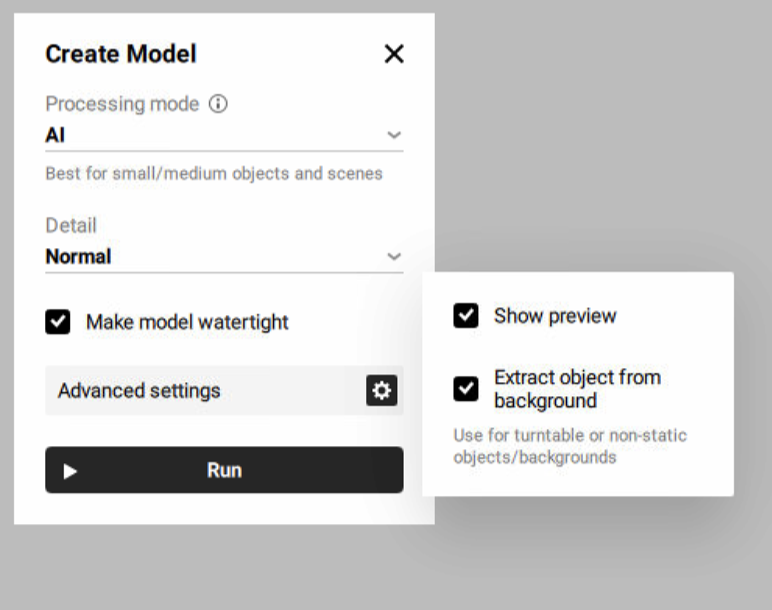
Figure 19 Create Model settings
Before creating your future model, you can adjust the following settings:
Processing mode defines which algorithm (AI or Classic) will be used to create a 3D model from photos, depending on the type of object and capture method.
AI: best for small to medium-sized objects and static scenes. Suitable for both “with masks” and “without masks” modes depending on background consistency.
Classic: best for large objects and highly detailed scenes such as landscapes or drone data sets.
Refer to Photogrammetry Overview for more information on photogrammetry and algorithm types that Artec Studio Lite suggests.
Detail: defines the level of details in the reconstructed model. In most cases, the Normal option would be enough. Use the High option if you need extra level of details or better reconstruction of thin structures of the object. The High option might result in more detailed but noisier reconstruction compared to the Normal option. It also takes longer to calculate.
Show preview enables a real-time preview
Extract object from background defines whether the object will be automatically separated from the background, resulting in a clean model. Recommended for turntable or non-static objects/backgrounds.
Click Run to launch the algorithm
Once calculation is finished, a 3D model appears in the Workspace panel and in the 3D view window.
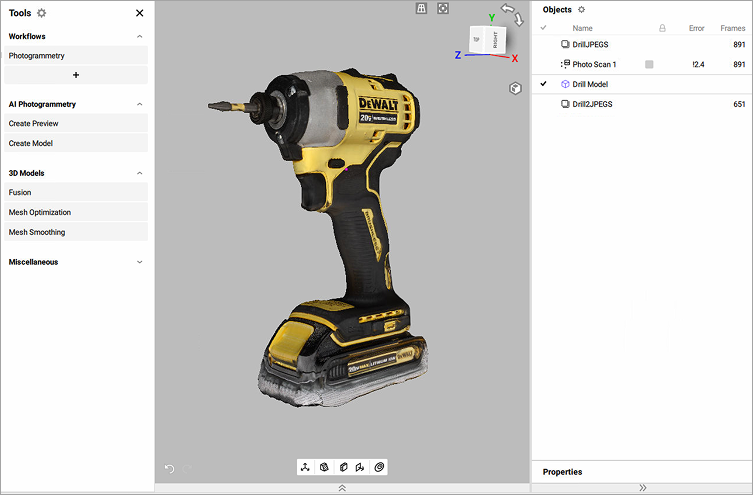
Figure 20 Created model in Artec Studio Lite
Project Masks
Artec Studio Lite allows to project object on masks. A mask defines which part of the photo belongs to the object you want to turn into a 3D model. It separates the object from the background. In AI Photogrammetry, masks help the algorithm focus only on the object, providing the high quality of the 3D model. The masks projection feature enhances the accuracy of 3D mesh reconstruction by leveraging masks created from the registered preview (Photo scan). This tool is particularly useful when the initial mask detection during the Create Preview algorithm fails or produces inaccurate results. By projecting new masks onto the created 3D model, users can exclude unwanted details, such as background elements, and regenerate a cleaner, more precise 3D model.
The typical workflow would be:
Run the Create Preview algorithm to generate a Photo scan. For preview settings, refer to Creating Preview.
Identify inaccurate or faulty masks detected on certain images and exclude these images from the creating model process
To disable these masks:
Double-click the created Photo scan in the Workspace panel
Click a mask that you need to disable or Shift-click to select multiple masks
Right-click on the selected masks
Select the Disable mask option
Run the Create Model algorithm to generate a 3D model. For model settings, refer to Creating Model.
Project masks onto the excluded images based on the 3D model
To project masks:
Ensure that the created 3D model and the Photo scan are selected in the Workspace panel
Double-click the Photo scan in the Workspace panel
Enable the previously disabled masks by selecting them and choosing the Enable mask option from the right-click context menu. For a single mask, click the crossed rectangle icon in the upper-right corner of its preview.
Analyze the other masks and select the Project masks option from the right-click context menu
Recreate the 3D model with improved quality and accuracy by running the Create Model algorithm
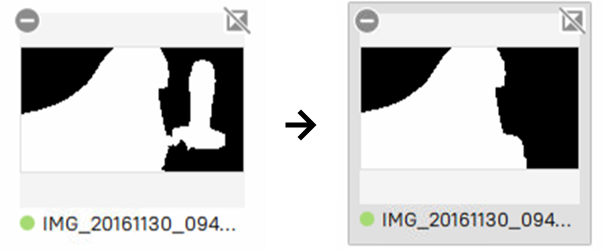
Figure 21 Example of projection masks before and after